Dress Plain or Ruffled for 18″ Doll
I started crocheting my basic sweater pattern for a teddy bear and decided to keep going and make it into a dress. The kids loved the dress so much, I adapted the pattern for an 18-inch doll too! The beginning of the pattern is almost identical to my sweater and beanie pattern, except it uses a smaller yarn so it is not so bulky.
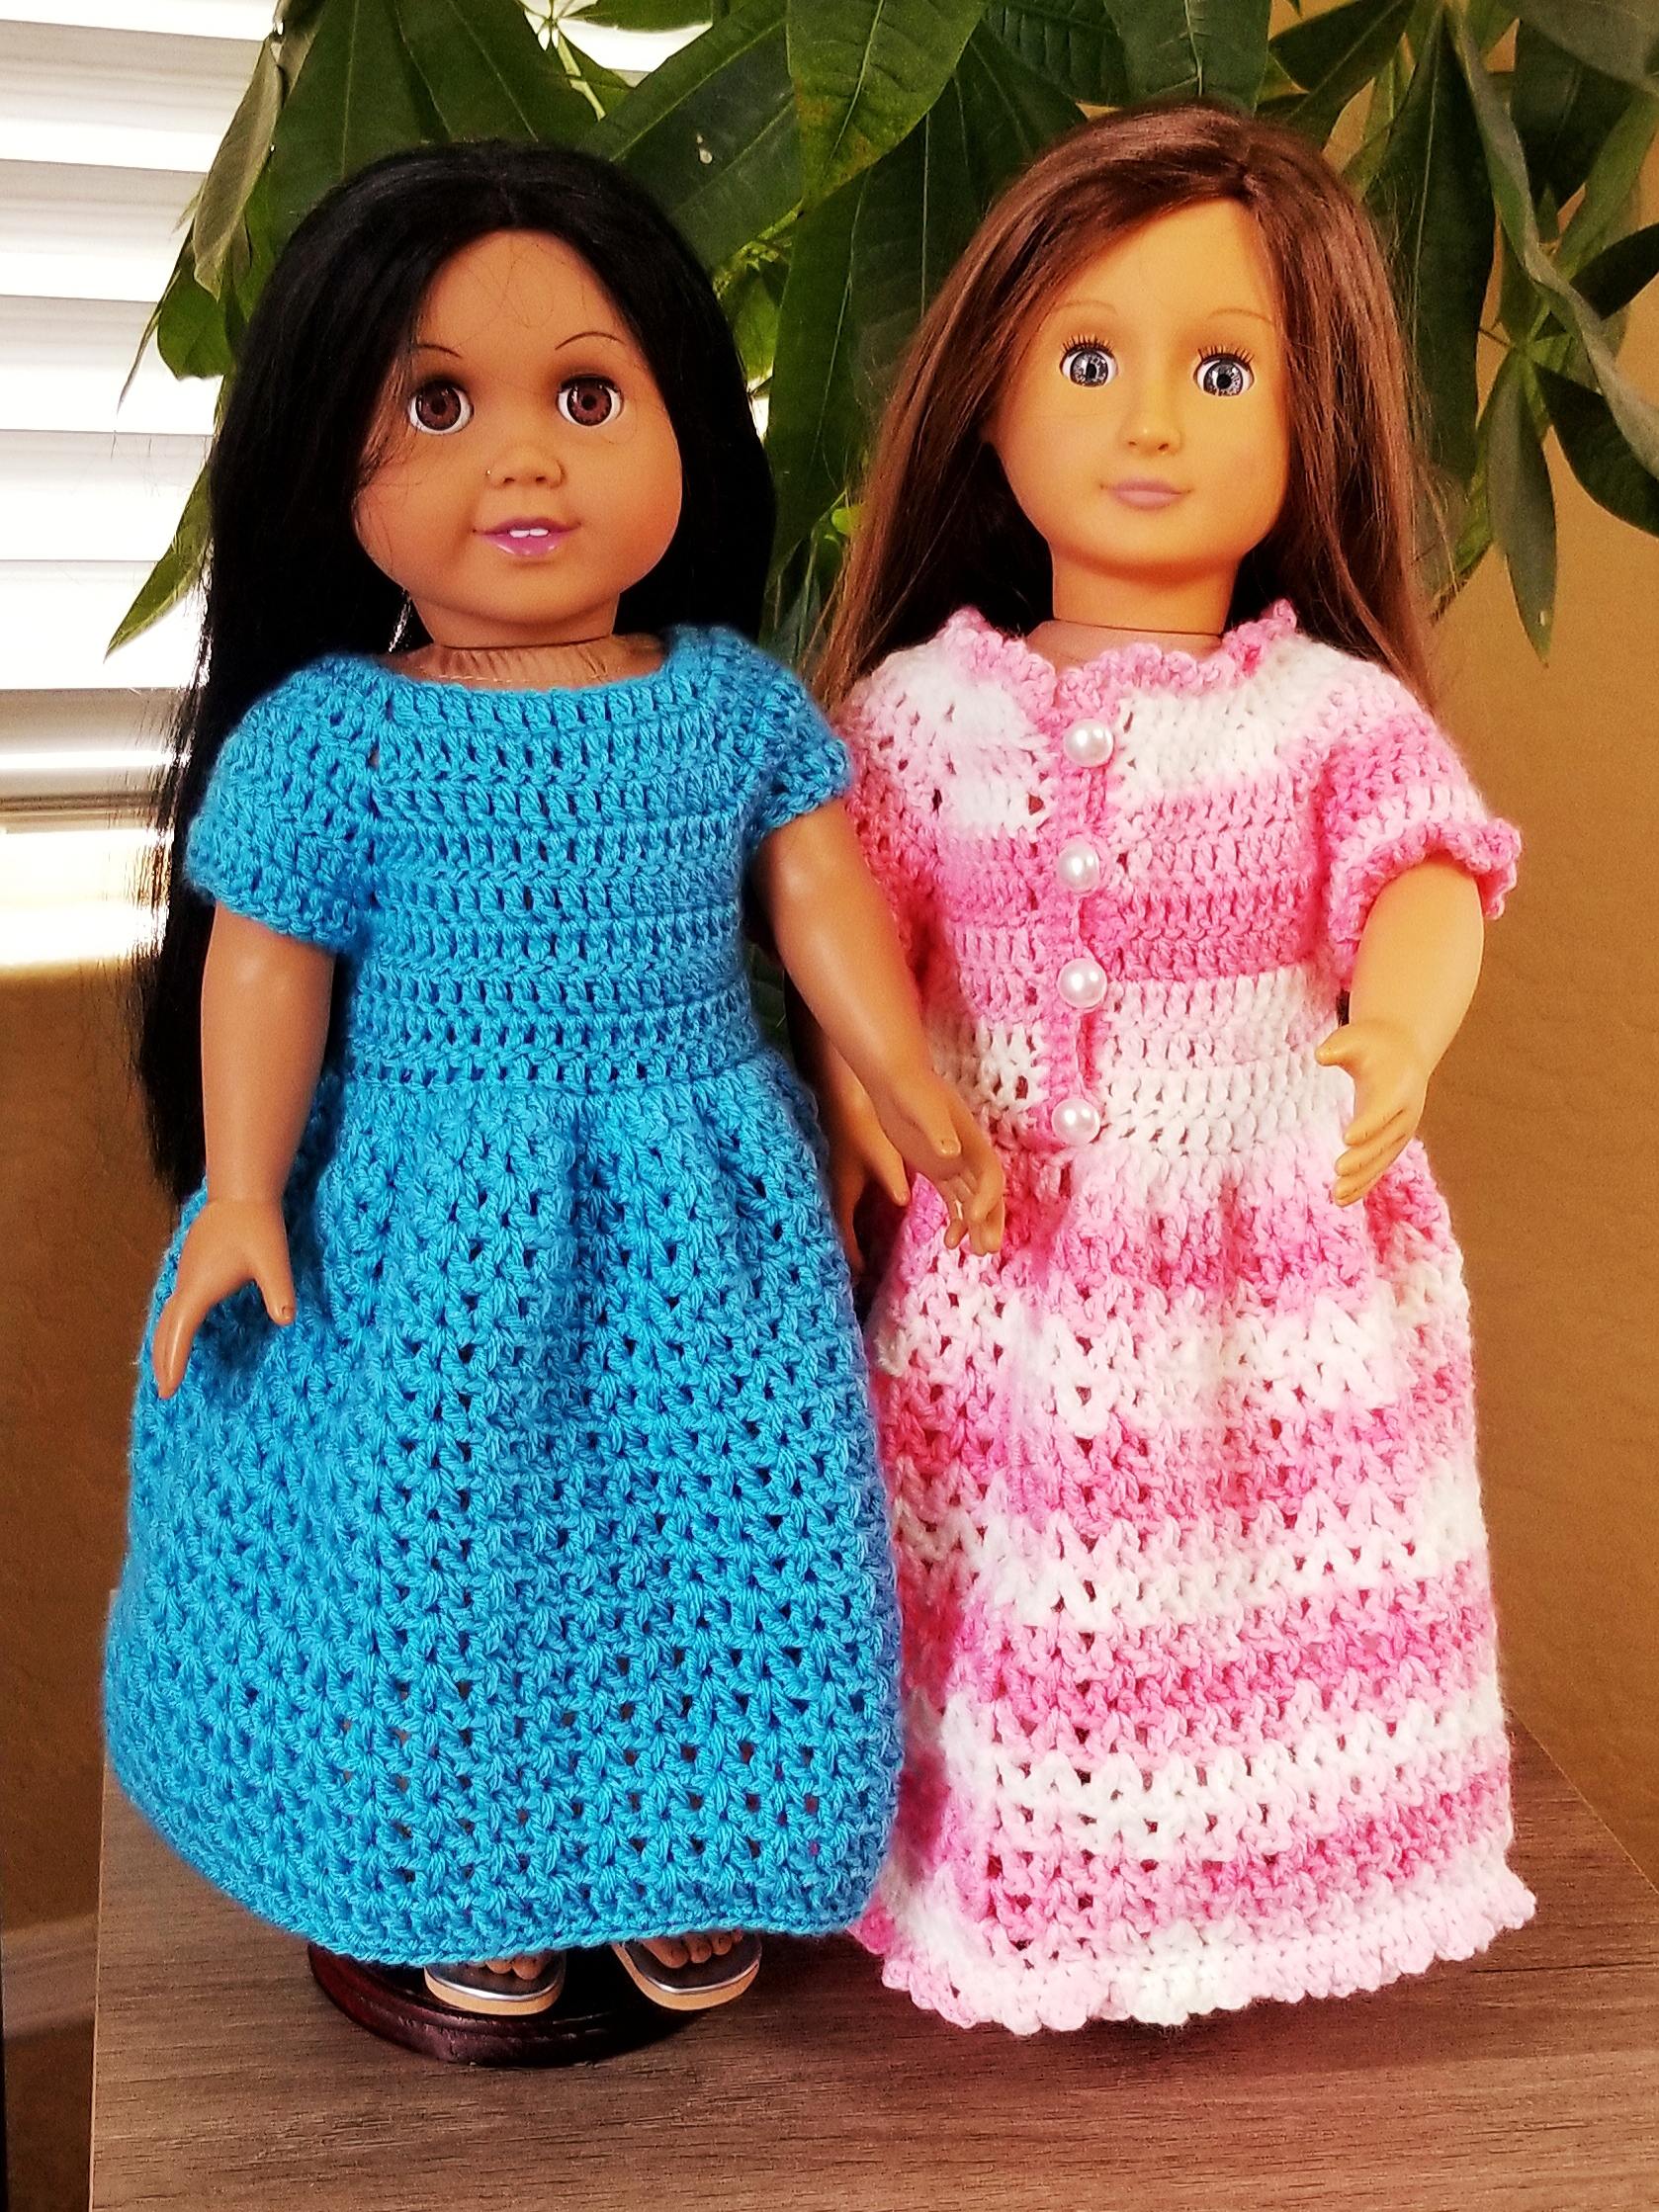
The Blue dress modeled above was made with Premier Deborah Norville Everyday Baby yarn, and it held its shape very nicely. The pink striped dress was made with Lion Brand Ice Cream yarn, which I love, but it did turn out softer with a bit more stretch. As always, please feel free to contact me if you find any mistakes! ~ Granny
Try out the NEW Matching Sun Hat Plain or Ruffled!
MATERIALS:
• 1 skein 3-ply light worsted yarn (about 200 yards) Size 3, Bernat Baby Sport or similar stiffer yarn works best. Models are wearing Premier Deborah Norville Everyday Baby and Lion Brand Ice Cream.
• E / 3.50 mm Crochet Hook, or size to obtain gauge.
• Plastic Yarn Needle
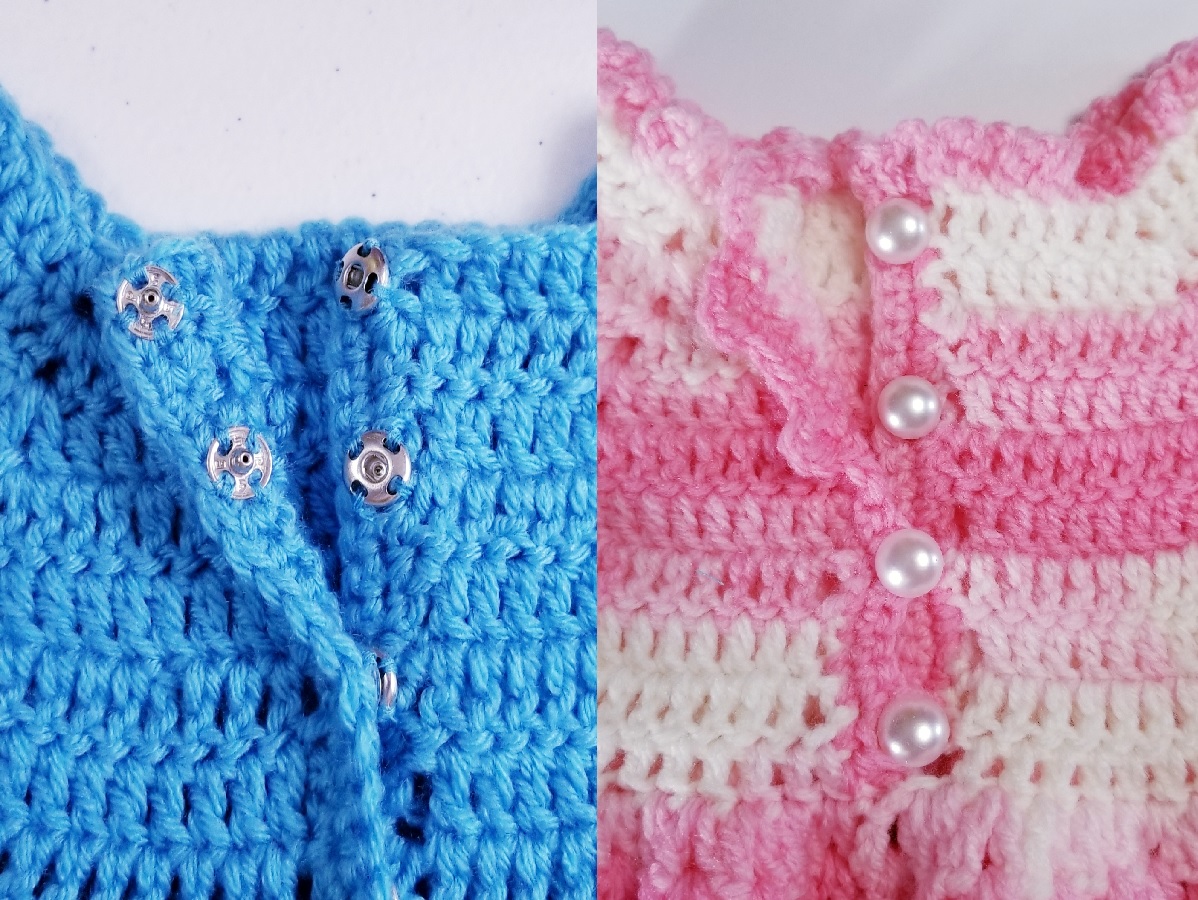
• 4 – ½ inch Buttons OR 4 – Sew-ology #1 snaps (3/8″ diameter)
STITCHES:
• Ch = chain
• Sc = single Crochet
• Dc = Double Crochet
• Sl st = slip stitch
• V-Stitch = dc, ch1, dc
GAUGE: 2 inches x 2 inches = 5 rows dc x 8 dc OR = 5 rows x 4 V-stitches
BODICE INSTRUCTIONS
Row 1: Ch 44. Dc in 4th ch from hook, dc in next 3 ch, V-stitch in next ch, dc in next 9 ch, V-stitch in next ch, dc in next 10 ch, V-stitch in next ch, dc in next 9 ch, V-stitch in next ch, dc in next 5 ch. Total of 46 dc, (counting the first ch three) plus 4 V- stitches.
Row 2: Ch 3 (counts as dc here and throughout), Turn. Dc in next 5 dc, V-stitch in next V-stitch, dc in next 11 dc, V-stitch in next V-stitch, dc in next 12 dc, V-stitch in next V-stitch, dc in next 11 dc, V-stitch in next V-stitch, dc in next 6 dc. Total of 54 dc.
Row 3: Ch 3, turn. Dc in next 6 dc, V-stitch in next V-stitch, dc in next 13 dc, V-stitch in next V-stitch, dc in next 14 dc, V-stitch in next V-stitch, dc in next 13 dc, V-stitch in next V-stitch, dc in last 7 stitches. Total of 62 dc.
Row 4: Ch 3, turn. Dc in next 7 dc, V-stitch in next V-stitch, dc in next 15 dc, V-stitch in next V-stitch, dc in next 16 dc, V-stitch in next V-stitch, dc in next 15 dc, V-stitch in next V-stitch, dc in last 8 stitches. Total of 70 dc.
Row 5: Ch 3, turn. Dc in next 8 dc, V-stitch in next V-stitch, dc in next 17 dc, V-stitch in next V-stitch, dc in next 18 dc, V-stitch in next V-stitch, dc in next 17 dc, V-stitch in next V-stitch, dc in last 9 stitches. Total of 78 dc.
Row 6: Ch 3, turn. Dc in next 9 dc, V-stitch in next V-stitch, dc in next 19 dc, V-stitch in next V-stitch, dc in next 20 dc, V-stitch in next V-stitch, dc in next 19 dc, V-stitch in next V-stitch, dc in last 10 stitches. Total of 86 dc.
Row 7: Ch 3, turn. Dc in next 10 dc, V-stitch in next V-stitch, dc in next 21 dc, V-stitch in next V-stitch, dc in next 22 dc, V-stitch in next V-stitch, dc in next 21 dc, V-stitch in next V-stitch, dc in last 11 stitches. Total of 94 dc.
Row 8: Ch 3, turn. Dc in next 11 dc, fold to align the first two V-stitches and dc through both of them to make arm hole, dc in next 24 dc, fold to align the next two V-stitches and dc through both of them to make arm hole, dc in next 12 dc. Total of 50 dc.
Rows 9: Ch 3, turn. Dc in each dc across. Total of 50 dc.
Row 10: Ch 3, turn. Dc in each dc across. Close bodice by joining with sl st into 3rd ch of the beginning ch 3 of the row. Do NOT fasten off!
SKIRT INSTRUCTIONS
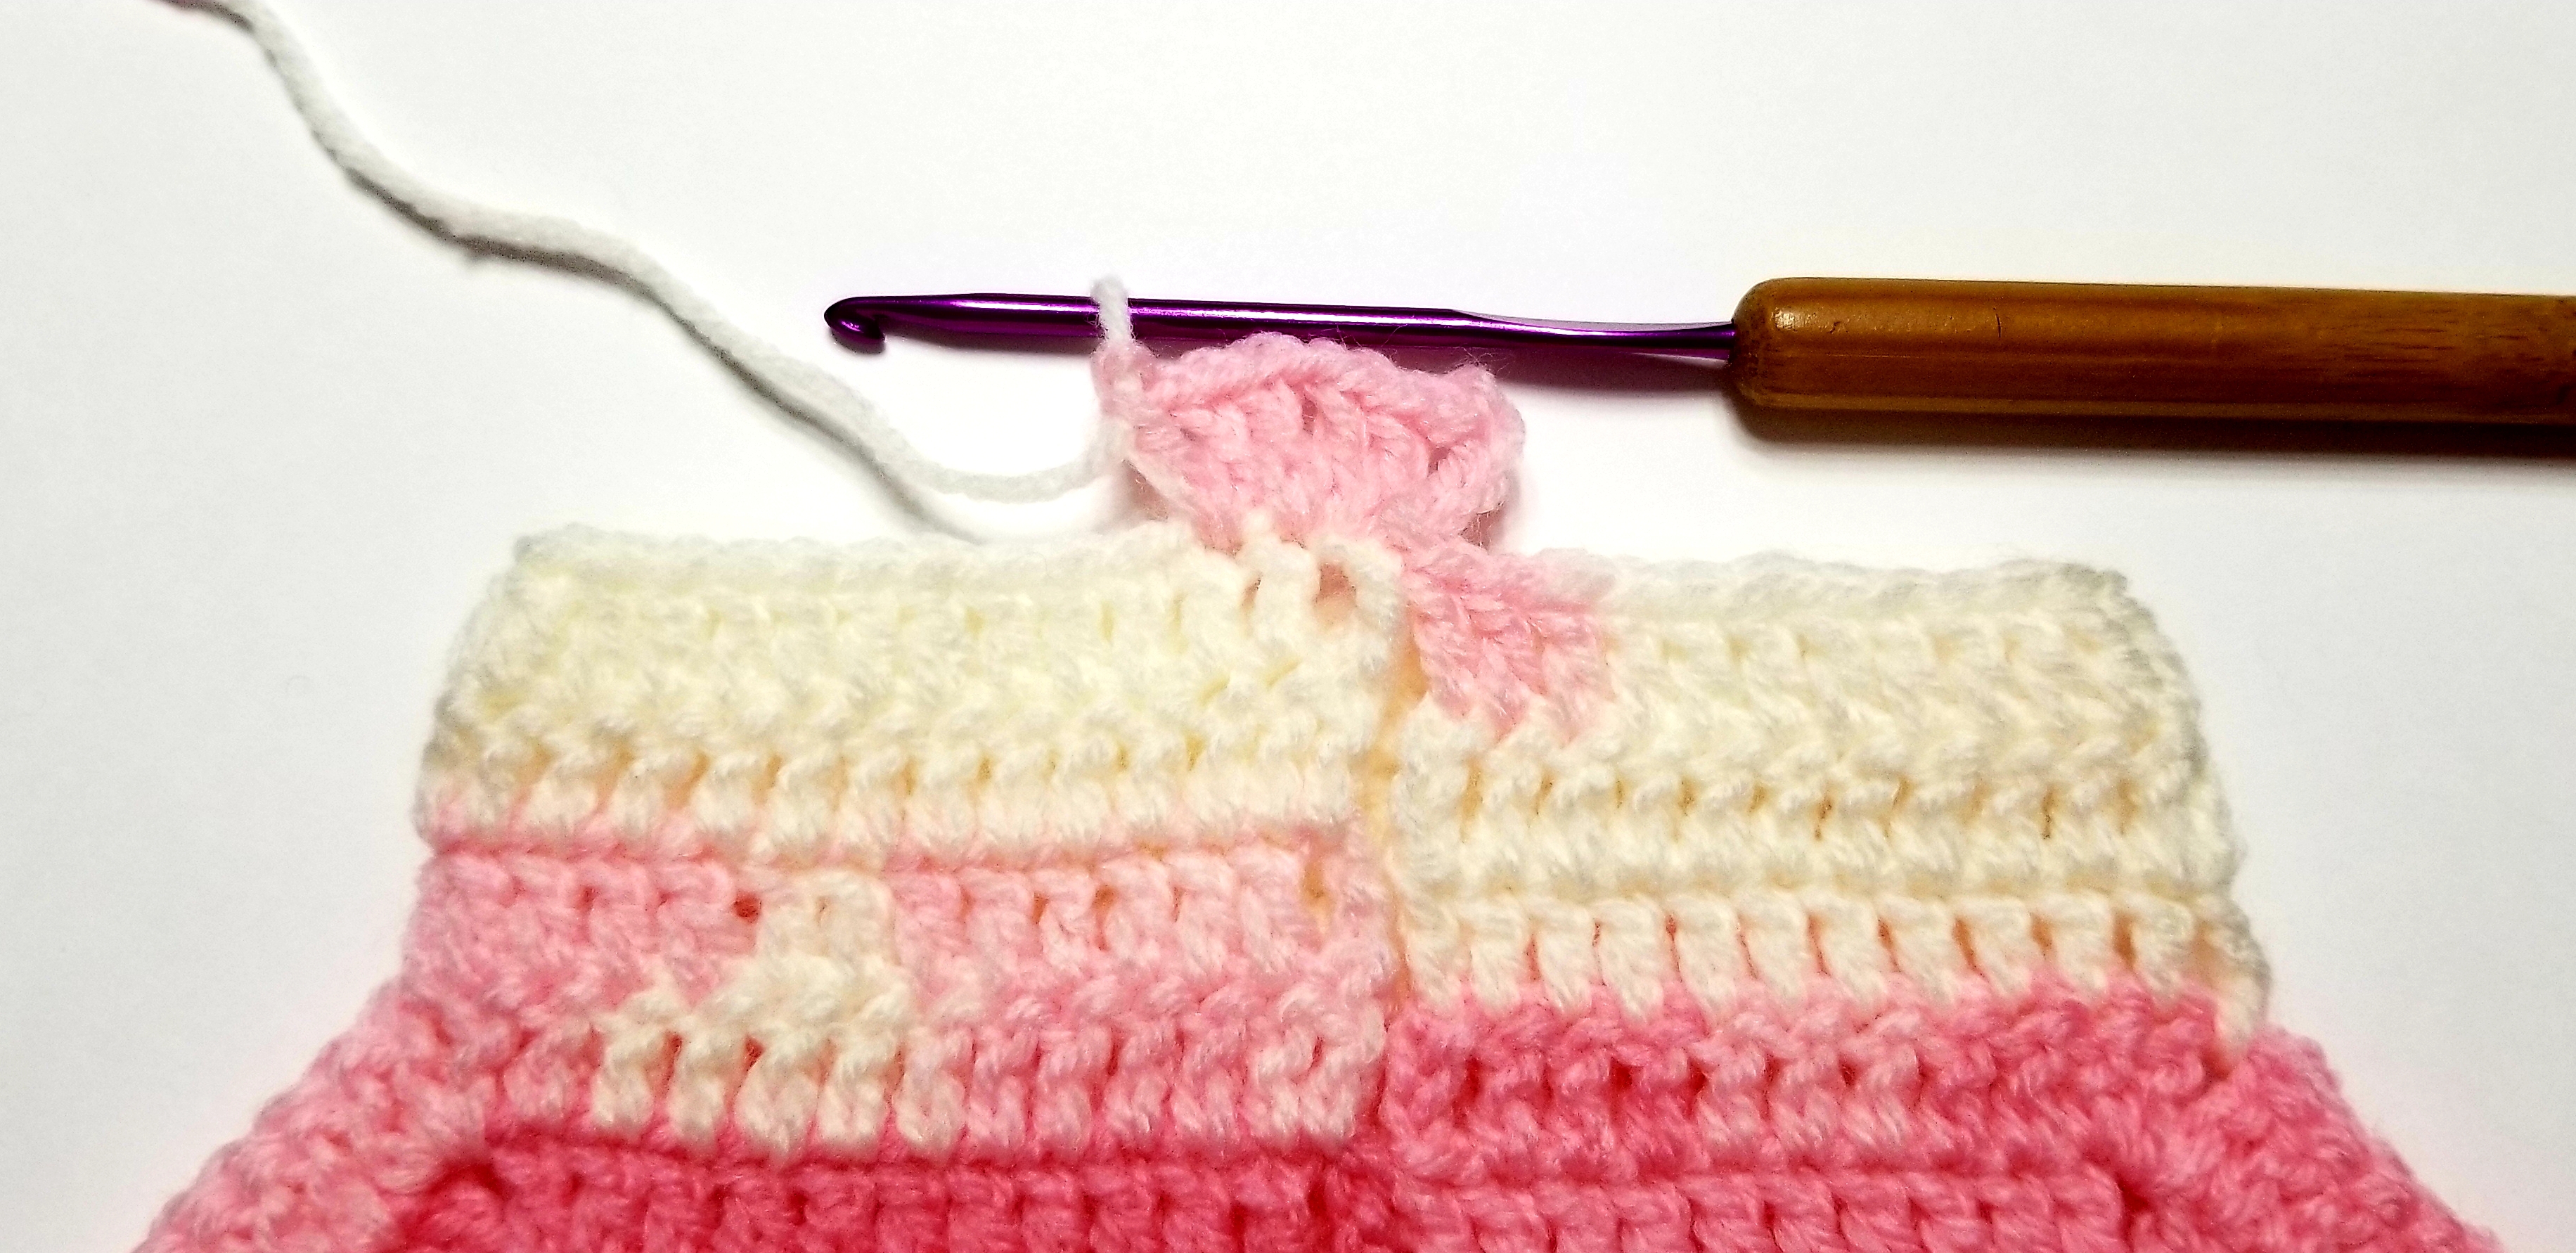
Round 1: Ch 4, dc in same stitch (counts as 1st V-stitch). V-stitch in each dc around. Join with sl st into 3rd ch of ch 4 at beginning of round. Total of 50 V-stitches.
Round 2 – 18 (Lengthen or shorten dress by using more or less rounds for desired length): sl st into ch 1 space of V-stitch. Ch 4, dc in same stitch (counts as 1st V-stitch). V-stitch in each V-stitch space around. Join with sl st into 3rd ch of ch 4 at beginning of round. Total of 50 V-stitches.
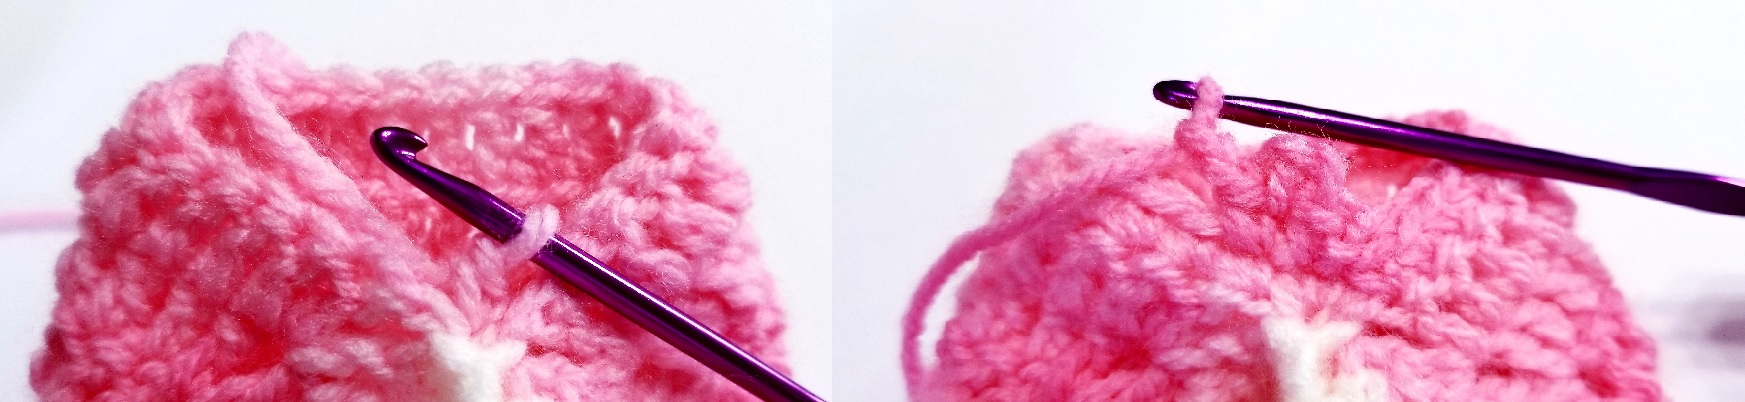
Round 19: Ch 1, sc in joining stitch. Sc in each dc around (skipping ch 1 spaces of V-stitches). Join to beginning sc with sl st. Continue to optional Round 20 OR Fasten off.
Round 20 (optional ruffle): Ch 1, sc in joining stitch. Ch 3, sc in next sc, repeat around. Join with sl st in beginning sc. Fasten off. –
If you would like matching ruffles on the sleeve edges, attach yarn at the underarm joining stitch of sleeve. Sc in same stitch and each stitch around sleeve. Join with sl st into beginning sc. Ch 1, sc in joining stitch. Ch 3, sc in next stitch, repeat around bottom of sleeve. Join with sl st into beginning sc.
Choose either the Snap Band OR Button Band to complete dress.
SNAP BAND
Attach yarn at top of neckline. Ch 1 (counts as first sc), 2 sc in end of each dc row down the side of the bodice opening. Total of 20 sc. 2 sc in end of each dc row up the other side of the bodice opening. Total of 20 sc. Ch 1, Turn.
Plain Neckline: Sc in each sc along each side of the bodice opening, with 3 sc into the last top corner sc. Sc into each stitch around the neckline, ending with 2 additional sc in the last corner stitch. Join with all into existing corner stitch.
Ruffled Neckline: Ch 3, sc in same sc. *Ch 3, sc in next ch of neckline*, Repeat * to * around neckline, ending with a sl st after last ch 3. Fasten off.
Fasten off. Hand sew 4 snap fasteners on each side of bodice opening. Enjoy your dress!
BUTTON BAND
Attach yarn at top of neckline. Ch 1 (counts as first sc), 2 sc in end of each dc row down the side of the bodice opening. Total of 20 sc. 2 sc in end of each dc row up the other side of the bodice opening. Total of 20 sc. Ch 1, Turn.
Sc in next sc, *Ch3, sc in next 5 sc*, repeat from * to * 2 more times, ch 3, sc in next 4 sc. Sc in each sc going up the opposite edge of bodice opening.
Plain neckline: Sc in each sc along each side of the bodice opening, with 3 sc into the last top corner sc. Sc into each stitch around the neckline, ending with 2 additional sc in the last corner stitch. Join with sl st into existing corner stitch. Fasten off.
Ruffled Neckline: Ch 3, sc in same sc. *Ch 3, sc in next ch of neckline*, Repeat * to * around neckline, ending with a sl st after last ch 3. Fasten off.
Hand sew ½ inch dome buttons to correspond with ch 3 button loops.
Pattern and photos © 2018 to present Patricia J. Angus of Granny’s Crochet Shoppe. All rights reserved.
Pattern and photos may not be reproduced or distributed in any manner other than for personal use. Please make as many dresses as you desire to sell in your shops and for fundraisers! Please include a link to http://grannyscrochetshoppe.com when possible. THANK YOU!

12 thoughts on “Dress Plain or Ruffled for 18″ Doll”
Michelle McAlea
I just want to say Thank-You so much for taking your time to write and share your patterns!!! I am looking forward to making these adorable dresses for my granddaughter’s “babies!!”
Merry Christmas 🎄
LikeLike
pjangus
You are so welcome! I hope you and yours all have a blessed holiday season!
LikeLike
Sheila Forman
I like the blue dress and would like to add an apron that goes around the waste and a granny bonnet. Do you have any patterns for these. HOPPING….
LikeLike
pjangus
Sorry I personally do not. I haven’t had much time lately to add to my pattern collection either, but that might be a good idea for future patterns! An apron may not be too difficult to figure out though. Do you want one that ties at the waist, or more like a pinafore? Also, some people have suggested that dress may actually turn out better with a slightly smaller hook and number 3 yarn. Depends upon how tight your stitches are.
LikeLike
Marsha Erickson
I am using size D hook and 3 ply yarn and it still coming too big! I think chaining 44 is too much!
LikeLike
pjangus
May I ask what brand of yarn you are using? If you notice in the photo of the 2 dresses, the blue dress seems to fit the doll better, because it is made from a stiffer yarn. I did correct a few errors in the pattern, but you are welcome to adjust the pattern in a way that works for you — even if it means using fewer chain stitches. Have you completed the entire dress? It may fit better after you have added buttons or snaps. I write free patterns for fun and share for others to enjoy. I make no money from them. I am so sorry this one is not working out for you so far. 🤔
LikeLike
Teresa Joudrey
When you say to v-stitch in next DC, do you mean in the center of the v stitch in the previous row?. Also you missed a section in row 2. You have only mentions 3 v-stitches.
LikeLike
pjangus
Happy New Year, Teresa! Thank you for catching that error! I will revise the pattern immediately! I don’t always test my free patterns as thoroughly as those I sell, because I get excited and rush to post them for others to enjoy. Thank you so much!
LikeLike
Marsha Erickson
I used E hook and 3 ply yarn but its getting too big! I held to my doll!
LikeLike
pjangus
Oh dear! Perhaps your stitches are looser than mine, or the yarn is more stretchy. You can try using a smaller hook, and that may possibly help.
LikeLike
Marsha Erickson
Thank you
LikeLike
Teresa Joudrey
You need to check you gauge before you start.
LikeLike