Simply a Christmas Stocking
Granny’s best selling pattern is now FREE!
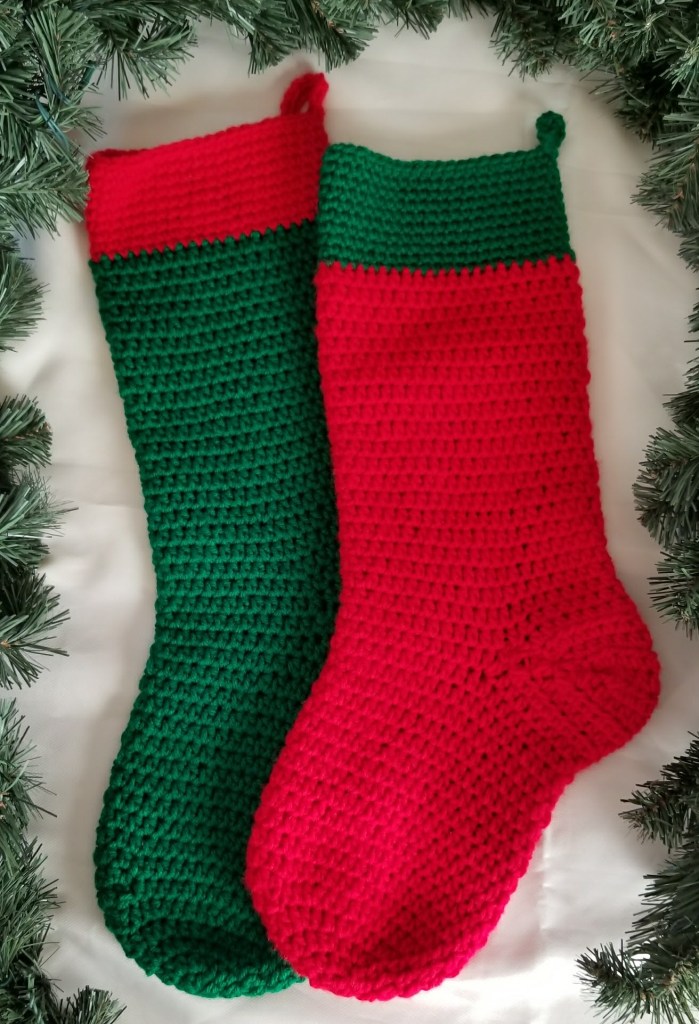
Embellish this Basic Christmas Stocking according to your own creativity!
Measuring approximately 19 inches from top to longest part of toe, this is the perfect Christmas stocking for children young and old and includes space to personalize it with your own special flair! It is machine washable, relatively durable, colorful and has a larger toe area to fill with lots of goodies on Christmas Eve! If you have any questions about the pattern, please contact Granny. Very similar to A Traditional Christmas Stocking!
Stocking is worked in rounds from the toe to the top cuff. We will begin the stocking with increasing rounds, as we would begin making a beanie. Watch my tutorials for Magic Adjustable Loop and Beanie in Half Double Crochet if you need assistance. 😊
Materials:
- Color A — 1 skein Color of your choice Super Saver Yarn for body of the stocking
- Color B — 1 skein White Super Saver Yarn for stocking cuff and optional heel color
- H / 5.00 mm Crochet Hook
- Stitch Marker
- Plastic yarn needle
Stitches:
- Magic Adjustable Loop
- Ch – chain stitch
- Sc — single crochet
- Hdc – half double crochet
- Hdc2tog – half double crochet 2 together
- Sl st – slip stitch
GAUGE:
2 inches x 2 inches = 7 rows x 6 sc. Gauge is not important. You can adjust stocking size by using alternate weights of yarn and hook sizes.
TOE & FOOT
ROUND 1: Make Magic Adjustable Loop, ch 2, hdc 7 more times into loop. Join with sl st into top of ch 2. Total 8 hdc, including ch 2.
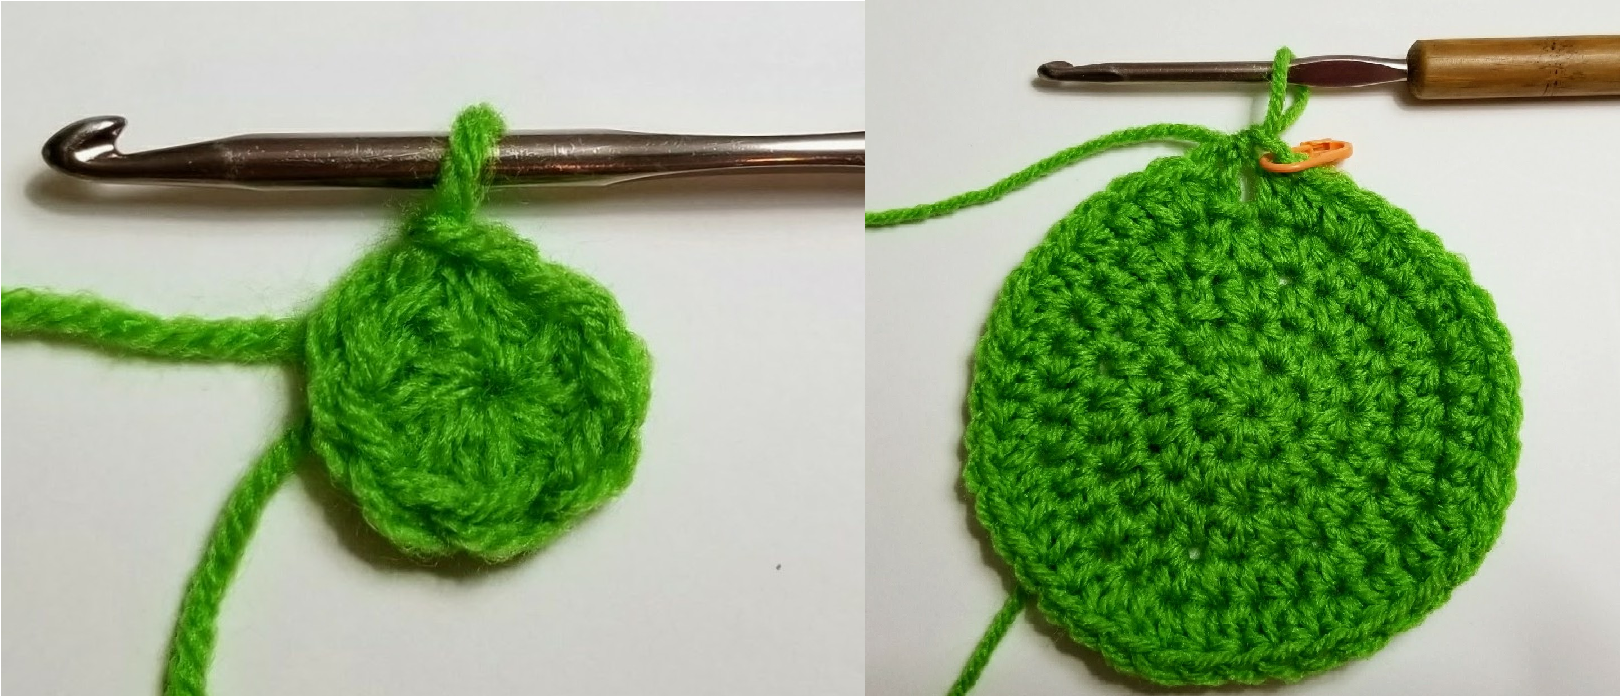
ROUND 2: ch 2, 2 hdc in next 7 hdc, 1 hdc in same stitch as ch 2. Join with sl st into top of ch 2. Total 16 hdc, including ch 2 stitch.
ROUND 3: ch 2, *2 hdc in next stitch, 1 hdc in next stitch*. Repeat from * to * 6 more times. 2 hdc in next stitch. Join with sl st into top of ch 2. Total of 24 hdc, including ch 2 stitch.
ROUND 4: ch 2, *2 hdc in next stitch, 1 hdc into each of next 2 stitches*. Repeat from * to * 6 more times. 2 hdc in next stitch, 1 hdc into next stitch. Join with sl st into top of ch 2. Total of 32 hdc, including ch 2 stitch.
ROUND 5: ch 2, *2 hdc in next stitch, 1 hdc into each of next 3 stitches*. Repeat from * to * 6 more times. 2 hdc in next stitch, 1 hdc into next 2 stitches. Total of 40 hdc, including ch 2 stitch.
Join with hdc into top of ch 2. Place Stitch marker into hdc.
ROUNDS 6 through 19: hdc in each hdc around. Total of 40 stitches for each round. Move stitch marker up one round each time you complete a round. Working in spiral rounds will minimize the seams in your stocking. After Round 19 only — LEAVE STITCH MARKER IN PLACE. Don’t move it up.
HEEL — (Optional – Attach color B, but keep Color A attached at end of round 19.)
Be sure you leave the stitch marker in place after round 19, because we will return to it. Continue where you left off on Round 19 and begin crocheting rows that will form the heel.
The first 5 rows will decrease, and the next 5 rows with increase:
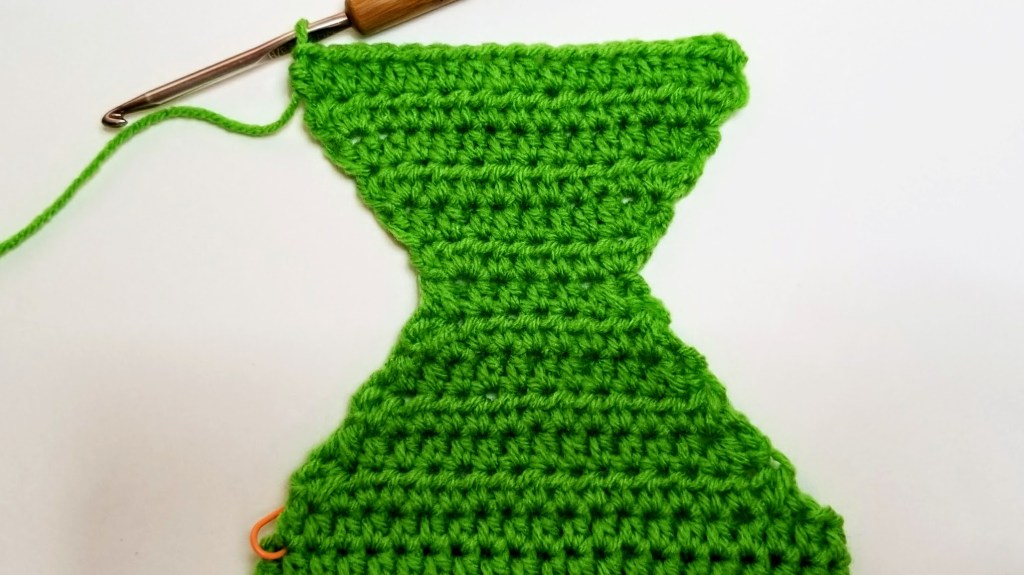
Decreasing Rows:
HEEL ROW 1: Ch 2, turn. 1 hdc2tog, 14 hdc, 1 hdc2tog.
HEEL ROW 2: Ch 2, turn. 1 hdc2tog, hdc in next 12 hdc, 1 hdc2tog.
HEEL ROW 3: Ch 2, turn. 1 hdc2tog, hdc in next 10 hdc, 1 hdc2tog.
HEEL ROW 4: Ch 2, turn. 1 hdc2tog, hdc in next 8 hdc, 1 hdc2tog.
HEEL ROW 5: Ch 2, turn. 1 hdc2tog, hdc in next 6 hdc, 1 hdc2tog.
Increasing Rows:
HEEL ROW 6: Ch 2, turn. 2 hdc in very first stitch, hdc in next 6 hdc, 2 hdc. Total of 11 hdc, including the ch 2.
HEEL ROW 7: Ch 2, turn. 2 hdc in very first stitch, hdc in next 8 hdc, 2 hdc. Total of 13 hdc, including the ch 2.
HEEL ROW 8: Ch 2, turn. 2 hdc in very first stitch, hdc in next 10 hdc, 2 hdc. Total of 15 hdc, including the ch 2.
HEEL ROW 9: Ch 2, turn. 2 hdc in very first stitch, hdc in next 12 hdc, 2 hdc. Total of 17 hdc, including the ch 2.
HEEL ROW 10: Ch 2, turn. 2 hdc in very first stitch, hdc in next 14 hdc, 2 hdc. Total of 19 hdc, including the ch 2. (Optional – Fasten off Color B and resume Color A as we begin working in rounds.)
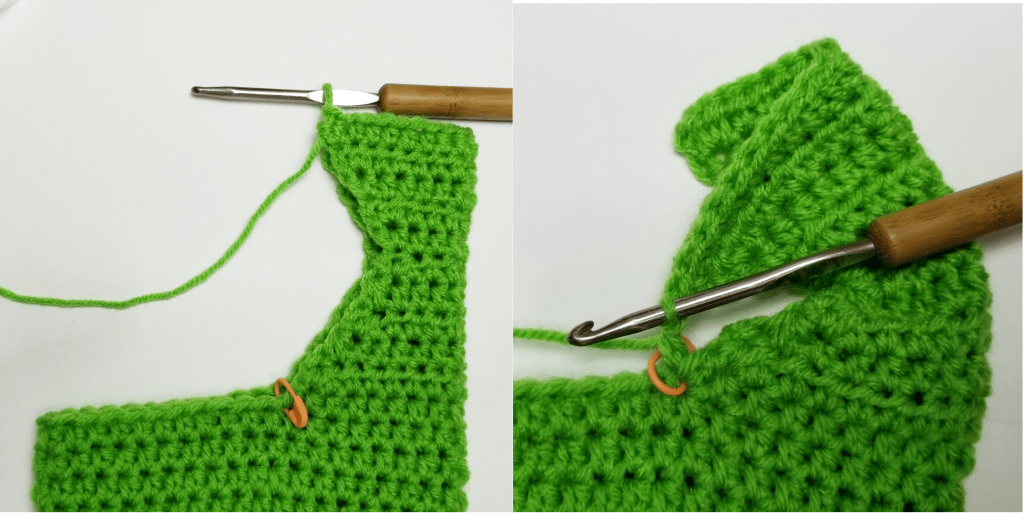
Now we will resume crocheting rounds up through the ankle portion of the sock. The seams of the heel will be sewn together before we change colors for the cuff.
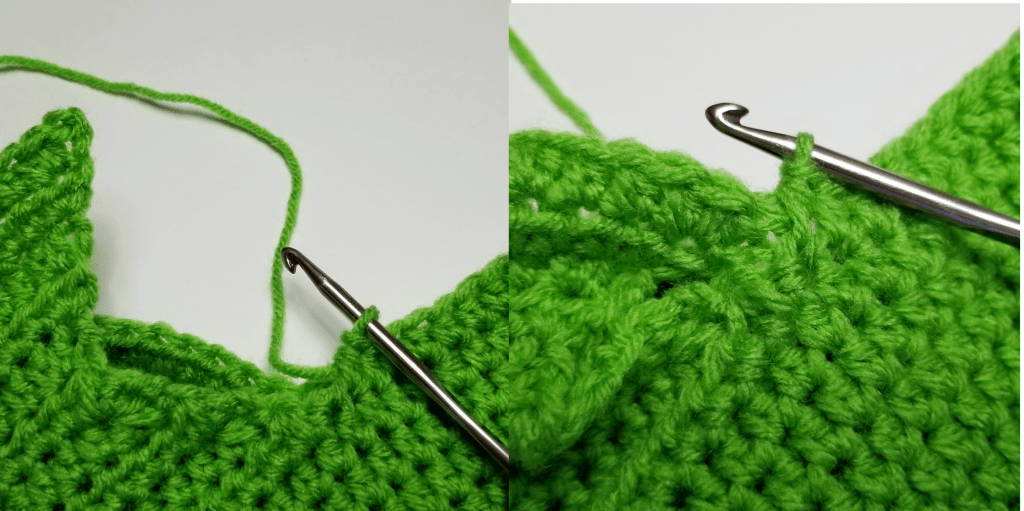
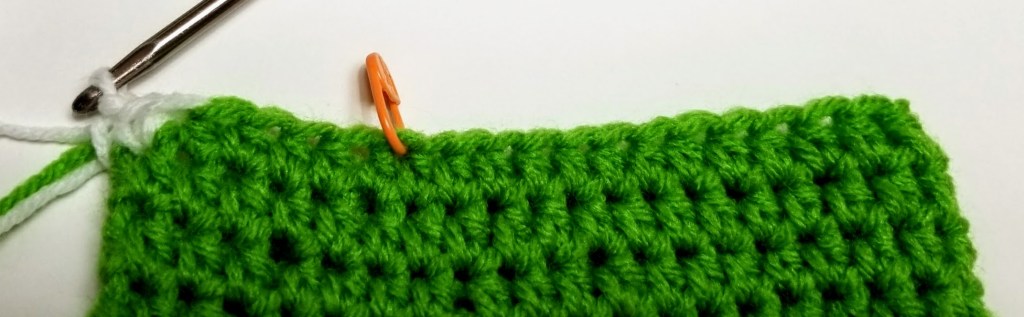
ROUND 20: Hdc into hdc with stitch marker from round 19 (See Figure 3). Move stitch marker up one round. hdc in next 22 hdc, hdc through 2 layers into the next stitch of the foot and connect it to the top of the ch 2 on free end at the top of the heel (See Figure 4), hdc in next 18 hdc. Join with a hdc into the first hdc of round. Total of 42 hdc for this round. Total of 42 hdc for this round. (Total number may vary slightly, depending upon how you attach the top of heal to the stocking.) Move stitch marker up one round.
ROUND 21 through 40: Hdc into each hdc around. Join with hdc into stitch with stitch marker, then move stitch marker up one round.
ROUND 41: Hdc in next few stitches until you reach the back edge of the stocking. Join with a sl st into the next stitch. Remove stitch marker. Fasten off. Turn stocking inside out. Using a length of matching yarn and a plastic yarn needle, sew the heel seams securely closed. Make sure toe is pulled tight. Weave in all loose ends. Trim.
ROUND 42: Attach color B to top of stocking aligned with the heel edge of stocking. Ch1, sc in same stitch, sc in each hdc around. Join with sc in first sc. Place stitch marker.
ROUNDS 43 through 52: sc in each sc around. Join with sc in sc with stitch marker. Move stitch marker up one round with the completion of each round.
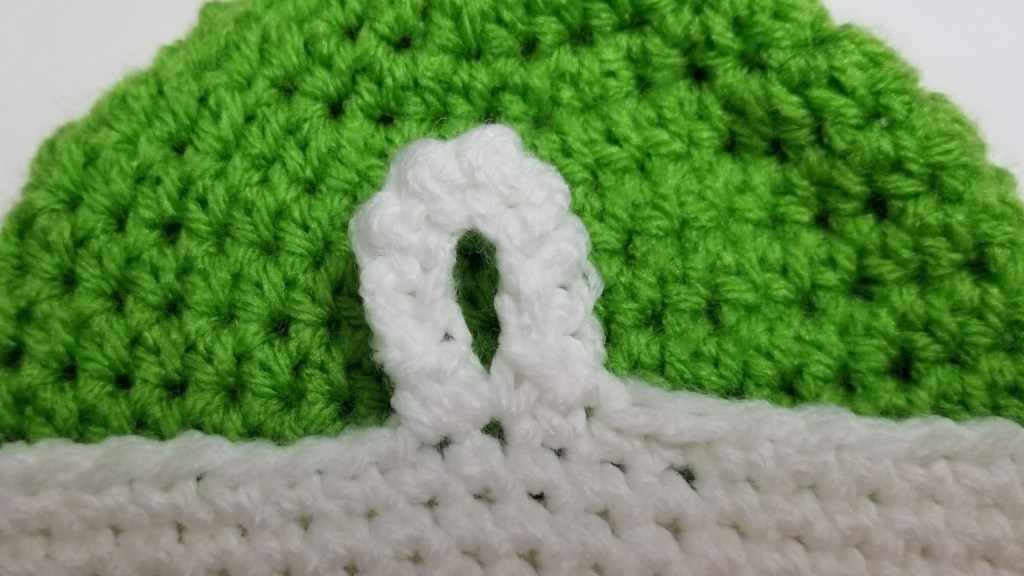
ROUND 53 (HANGER): sc in stitch with stitch marker and into next 3 stitches until you reach heel edge of stocking. Ch 8, sc into same sc, sc into next sc, ch1, turn. Sc in back bumps of ch 8 (8 sc), join with sl st into next sc. Fasten Off. Weave in loose ends. Trim.
*Wash your completed stocking in cold water and lay flat to air dry. This should block the shape of your stocking.
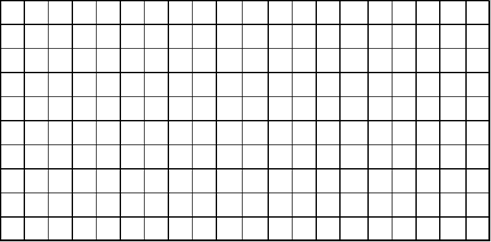
Use the graph to plan the personalization area on the cuff of your stocking. Cross-stitch or embroider a name or holiday greeting and/or add other embellishments to your stocking.
© 2017 Patricia J Angus of Granny’s Crochet Shoppe
All rights reserved. Pattern and photos may not be reproduced or distributed in any manner. Please make as many stockings as you desire to sell in your shops and for fundraisers! Please include a link to http://grannyscrochetshoppe.com when possible. THANK YOU!
